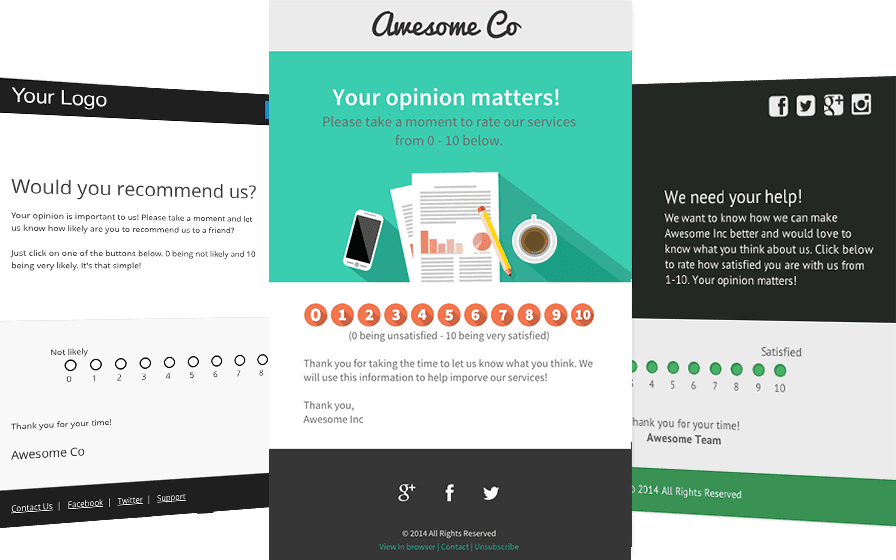
Here’s a Net Promoter Score (NPS) program that you can launch today to grow your product or service. It’s easy to implement on a limited budget, and it’s a great place to start when you don’t have a lot of resources to invest.
Wait, What’s a Net Promoter Score?
The Net Promoter Score is one of the most recognized ways to measure customer loyalty. It’s used figure out the lowest cost of keeping current customers and the best way to acquire new ones. To measure your NPS, all you need to do is ask one simple question:
“How likely is it that would you recommend our company to a colleague or friend?”
![]()
One question.
That’s it. And, calculating your Net Promoter Score is easy:

Net Promoter Scores allow you to:
- Predict where your customer behaviour is headed down the road
- Engage & learn from the customers that really care about your product
- Stop customer churn
For more info on NPS and how it works, watch this video.
The Problem with NPS
The trouble with NPS programs is that gathering and storing Net Promoter Scores can be difficult (and/or expensive). Luckily, we have a free hack that you can implement in about 20 minutes to start gathering and storing your NPS data.
The Solution
In this tutorial we will:
- Gather NPS responses using an open source email template
- Store and track the results using Wufoo’s online form management.
Customers Receive an NPS survey -> They provide feedback -> You get data
BOOM! Let’s get started!
Step One: Download a Responsive NPS Survey Template

- Head to the Sendwithus.com’s Open Source Email Project
- Choose a theme
- Download an NPS survey template
You’ll use these HTML email templates to gather your NPS data. You can edit the template directly or you can import it into your email template manager to brand the email for your own company.*
*If you don’t have an email template manager, try Sendwithus – it’s free!
Step Two: Create a Wufoo Form for your NPS data
We’ll be using Wufoo manage our NPS data. If you don’t have an account, sign up for free at wufoo.com. When you get to the Wufoo dashboard, hit “Create a New Form,” under the “Forms” tab. That should bring you to the form builder. Create a form with these 4 elements:
- Title Message
- Paragraph Box for Additional Feedback
- 1 – 10 Multiple Choice Field
- Email Address Field

Step Three: Create Custom URLs to Pre-populate Your Wufoo Form
In order to connect click data from your NPS survey to Wufoo’s database, you’ll need a way to pre-populate your Wufoo form. You can do this by using custom URLs. The basic URL of a Wufoo form looks like this:
http://username.wufoo.com/forms/form-name
If you click that URL, you’ll go to a form with no predefined values. But, if you add some custom values to the end of the URL, then the form will pre-populate with the assigned values. Like this:
 Wufoo allows you to populate forms with whatever data you like. In the example above we’ve passed in an email address variable, but it will accept any variable you throw at it – name, date, location, marital status, whatever. To write your custom URLs for you own Wufoo form:
- Head to the “Forms” tab
- Find the form you would like to pre-populate
- Click “Code”
- Then, Click “API Information” (in the top right corner)

Each Field Title has a corresponding API ID. The API ID is the number you use to reference a field. So, a field with an API ID of 5 will become:
Field5
The custom URL for a pre-populated form that includes a customer’s email and an NPS response of 5 might look like this:
http://username.wufoo.com/form-name/def/field6={{ customer_email }}&field1=5
Step Four: Create Custom URLs for Each NPS Survey Response
That might look something like this:
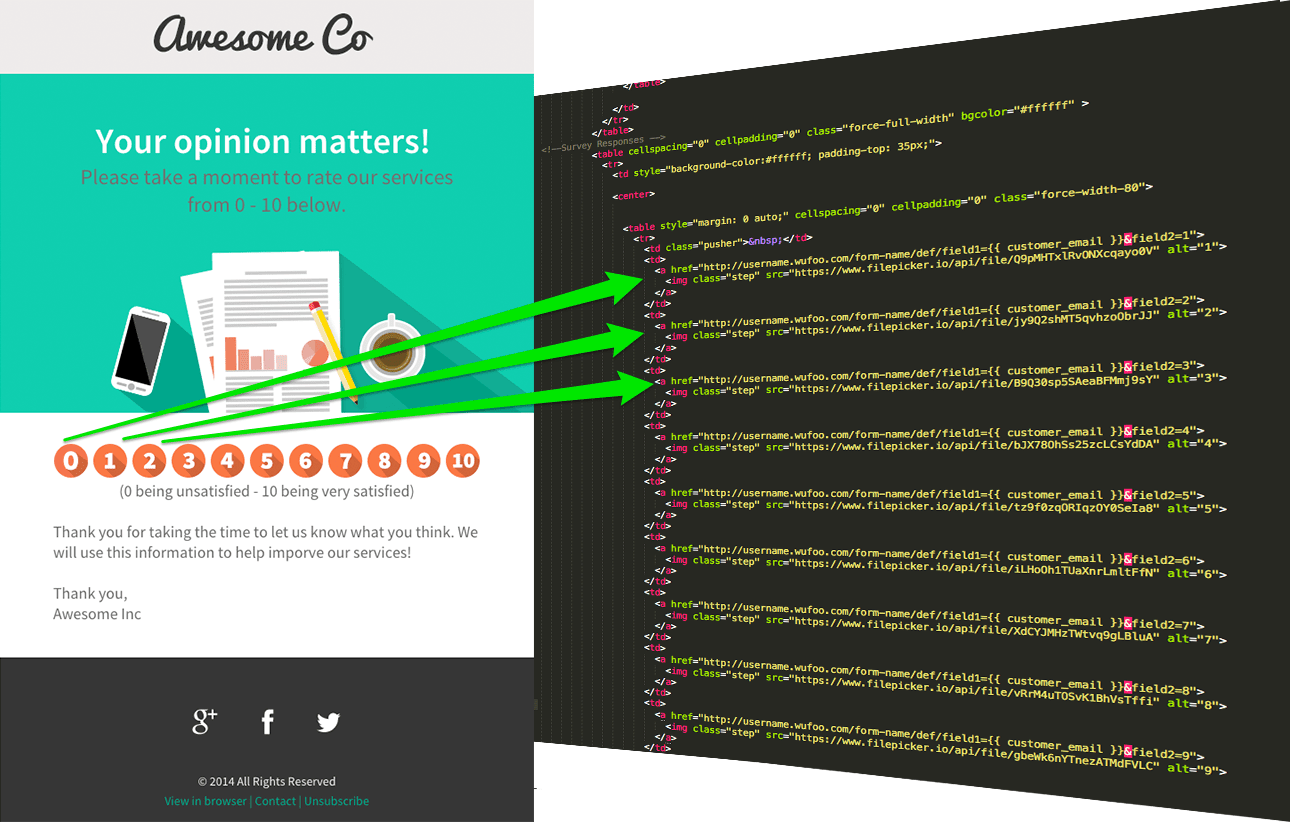
0 = http://username.wufoo.com/form-name/def/field1={{ customer_email }}&field2=0
1 = http://username.wufoo.com/form-name/def/field1={{ customer_email }}&field2=1
2 = http://username.wufoo.com/form-name/def/field1={{ customer_email }}&field2=2
Etc. Etc. You get the idea…
Step Five: Map your Custom Wufoo URLs to the NPS Email Template
Okay, time to dive into the HTML of your NPS email template* that you downloaded in step one. Each response (from 1 – 10) is a separate image, so enter the corresponding Wufoo URL as a link in the HTML.

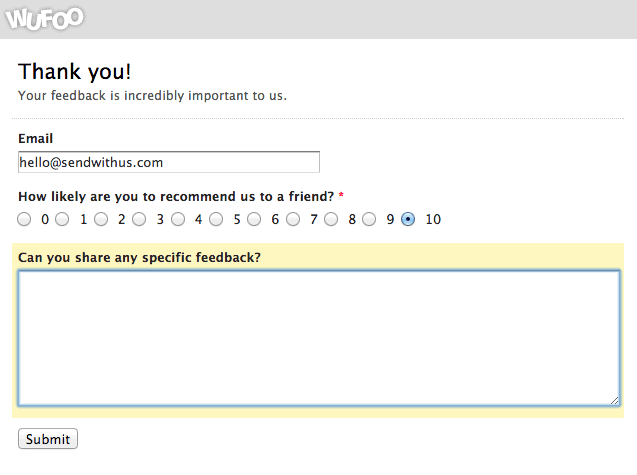
Now, when customers click their response in the email they get a pre-populated Wufoo form, like this:

*Template management can be a pain. For a simple and intuitive email template management system, try Sendwithus – it’s free!
Step Six: Hide the Pre-Populated NPS Fields in Your Form
Because we’ve pre-populated the multiple-choice and email fields with the data gathered through our NPS email, let’s hide those two fields. To hide a Wufoo field:
- Click “Field Settings”
- Select the field you would like to hide
- Type the word “hide” in the “Add CSS Layout Keywords” field.

Now, after a customer clicks a response they get this:

Voilà!
Now you have fully functional NPS Email that takes advantage of Wufoo’s analytics and reports.
Step Seven: Sending Your NPS Survey
NPS surveys tell you how customers feel about your company. They’ll tell you which leads to nurture and where to improve your product to reduce churn. But when should you gather NPS data? Mass emailing customers with NPS surveys once or twice a year will give you an annual or biannual Net Promoter health check, but NPS surveys are most effective right after a customer has had a meaningful interaction with your company. Important points to gather NPS data are:
- After a purchase
- After an interaction with customer support
- After a free trial
- After a blog signup
Gathering data at these points will give you a constant measure of your Net Promoter Score as customers interact with key parts of your product. To automatically send an NPS survey after a customer has taken an action, head to Sendwithus and start a drip campaign. You can trigger a survey email after your customers have received an email or after they’ve triggered an API call.
That’s it – now go and measure your Net Promoter Score for free. Export the CSV (or if you want to send it straight to Sendwithus, using Zapier let us know at beta@sendwithus.com) manage your customers, and make sense of your data! PS – We’d love to hear how this works out for you. Leave us a comment, shoot us an email at Hello@sendwithus.com, or hit us up on Twitter.
